Knowing when to harvest your garlic can sometimes be a confusing process. After all, garlic sits below the ground. One may feel the only clues they really have are the leaves. This is true to a point, in reality however, everything from the leaves, the stems, the soil and the bulbs themselves can all offer clues that help determine when to harvest ones garlic.
The Leaves Of the Garlic Plant
A garlic plants leaves really are the first clue to recognizing garlic has matured. Not all of the leaves mind you, the lower leaves!
Look closely at the leaves lowest to the ground. The very bottom set of leaves will often start to yellow and turn brown around the time your garlic is ready. This could also mean that your garlic needs a little water or is simply shedding; as such it’s not the only sign you should look for, it’s a clue!
Width of the Stalks
The size of the garlic stalk is a direct correlation to the size of the garlic below the ground. Simply stated as ones garlic matures the stalk also grows in thickness and width.
While looking at the lower leaves consider the size of the stalks. Are the stalks thin or have they started to widen up? As the stalks start to reach 1/2 inch to an inch around the bulbs below the ground should have expanded at least two to three times that size. Small thin stalks indicate the bulbs may not be ready.
The Soil Around the Garlic
Depending on how deeply the garlic was buried one can often see the dirt start to mound up around the base of the garlic stalk. This naturally occurs as the bulbs starts to expand below the ground. While looking at your leaves and the size of your stalks look at the soil! Is there mounding or cracking around the stalk? If the other two steps are present, and there is no dirt movement, continue with the next step anyway.
The Actual Garlic Bulbs
One may wonder how the actual garlic cloves can help you determine if they’re ready as they sit below the dirt. However, if one is seeing all three of the above clues, or at least two of the three clues above the ground they should check below ground and look at a sample of the garlic itself. The trick is to do this in a way that will enable the garlic to continue to grow if it is not yet ready.
Gently remove the dirt from around the stalk being careful not to injure the garlic or harm any of the roots. It’s important to leave the roots whole. Remove enough soil to enable the bulbs and the formation of the individual garlic cloves to show.
Garlic that still has a small head and very little cloves is not ready; recover the bulbs and they will continue to grow! Check back in another week or so!
Garlic that is large and well formed is ready!
Gently remove the garlic roots and all from the soil. Remove any large soil clumps however, do not wash them! It’s time to cure your prize.
Growing healthy roses can be one of the most enjoyable things to do… it can also be frustrating as they tend to get hit with things like Black Spot or other similar diseases. Here are a few Quick Tips to help your roses thrive:
Keep the Leaves of your roses Dry! Always water your roses from the base at the ground level. Keeping your leaves dry will detour common rose diseases like Black Spot.
Put Space Between your Plants! Plant your roses with a minimum of three to four feet between them. This can do wonders in keeping diseases from jumping from plant to plant within your space.
Feed your Roses Epsom Salt! Roses need Magnesium sulfate to grow strong and using a monthly regime of Epsom Salt will help keep them that way. Read more about Epsom Salt on the Quick Hit: Epsom Salt Once a Month!
Use Coffee Grinds in your Rose Beds! Roses like a slightly acidic soil. Coffee grinds in the beds add organic matter and a small amount of acidity. Feeding them monthly with your left over grinds is a natural way to feed your beauties! read more about Coffee Grinds in the article: Using Coffee Grinds in your Garden.
Add Banana Peals to your Rose Beds! Banana peals have a high level of natural potassium. Adding them to your soil is a great way to increase your roses potassium levels naturally and you don’t even have to decompose them. Simply bury them below your roses and watch them thrive!
Managing Black Spot
Even with these tips most rose gardens will face Black Spot, (also known as Diplocarpon rosae) on the leaves of their roses. Black Spot turns the leaves yellow and a classic black spot and will spread quickly from leave to leave.
Black spot hits in cool humid weather normally between 70 and 80 degrees. Which is why it’s commonly seen attacking our Texas roses in the spring time. There are a few things one can do to avoid black spot.
Follow No Water on Leaves rules as listed above!
Spray a Neem OilMix of 2 tsp. of Neem to 1 Gallon of Water and 3 tsp. of soap and spray your leaves. I use Rejuve Naturals.
Use a Baking Soda Mix of 2 tsp. baking soda to 1 gallon of water and 2 tsp. of dish soap to create an alkaline chemical condition on the roses and spray it on the leaves. The alkaline makes it difficult for the fungus to adhere to the leaves!
Using some of these small steps will help your roses perform better for you all year-long!
The Crinum Lilly is just a classic beauty! It’s long showy leaves and large heavily scented flowers of milky white and wine make it one of my favorite bulbs. It bottom line is next to impossible to kill. It is also one of the few flowers that can do as well in a partially shaded area or a full sunny spot. And even better, the Milk and Wine Lily is the first to bloom each summer and continues to bloom almost all season long.
Growing Crinum Lilies
The giant Crinum Lily is a member of the Amaryllis family and best grown in zones 6 and up as a perennial. Its bulbs can get very large and they don’t like to be moved. Not that one can’t move them. That is actually one of the reasons the Crinum Lilly runs a bit higher in price than most bulbs. The large main bulb will form many smaller bulbs around their giant center giving the owner plenty of plants for moving around their yard if one wants to do so. However, once the Crinum has a home it loves, it will for sure grab hold and want to stay making it one of the tougher bulbs to pull up.
Tips
Plant your Lily in the spring with the Bulb right below the surface. It will dig down as it grows.
Keep the soil moderately moist until it is established. Once established it will take most weather. I personally water my established bulbs only once a week even in extremely hot temperatures
The Milk and Wine Lily will produce long tall stems that hold up to a dozen flowers each. The weight of one stem gets heavier as the flowers bloom lending at times to the need for staking.
Purchase a few of the 24 – 36 inch plant stakes with the loop at the top. Then, place about 5 of them in the ground around the greenery and just leave them there. As the stems start to appear just grab one, loop the stem through it and walk off. Easy peasy!
Scotts offers a package of 24 Scott 36″ plant props for around 30 bucks. I purchased a pack three years ago and have not purchased any since then. I just move them from plant to plant as I need them.
Crinum Lily’s can get very large as they mature. As a result, their greenery or their flowers can sometimes look shabby. An easy way to take care of the greenery is simply to trim it back. They clip easily with shears almost like a shrub making the leaves very tidy and nice looking with the tall flowers sitting atop them.
To maintain beauty on the flowers snap the wilting flower off the head as they wilt leaving only the remaining fresh flowers on the stem. This is simple to do as one is walking by the plant.
There is nothing like the smell of the Milk and Wine Crinum Lily. Its fragrance will fill an area. As such, place it in a spot by a window or patio so on those hot summer days that fragrance can be enjoyed with company and a glass of lemon aid, wine or a cold beer.
The Milk and Wine Crinum Lily’s beauty, whimsical leaves, bright flowers and lovely fragrance will make one feel as if they stepped onto an old southern homestead. In addition, their greenery offers a nice texture to areas around houses or in corners even when flowers are not yet in bloom.
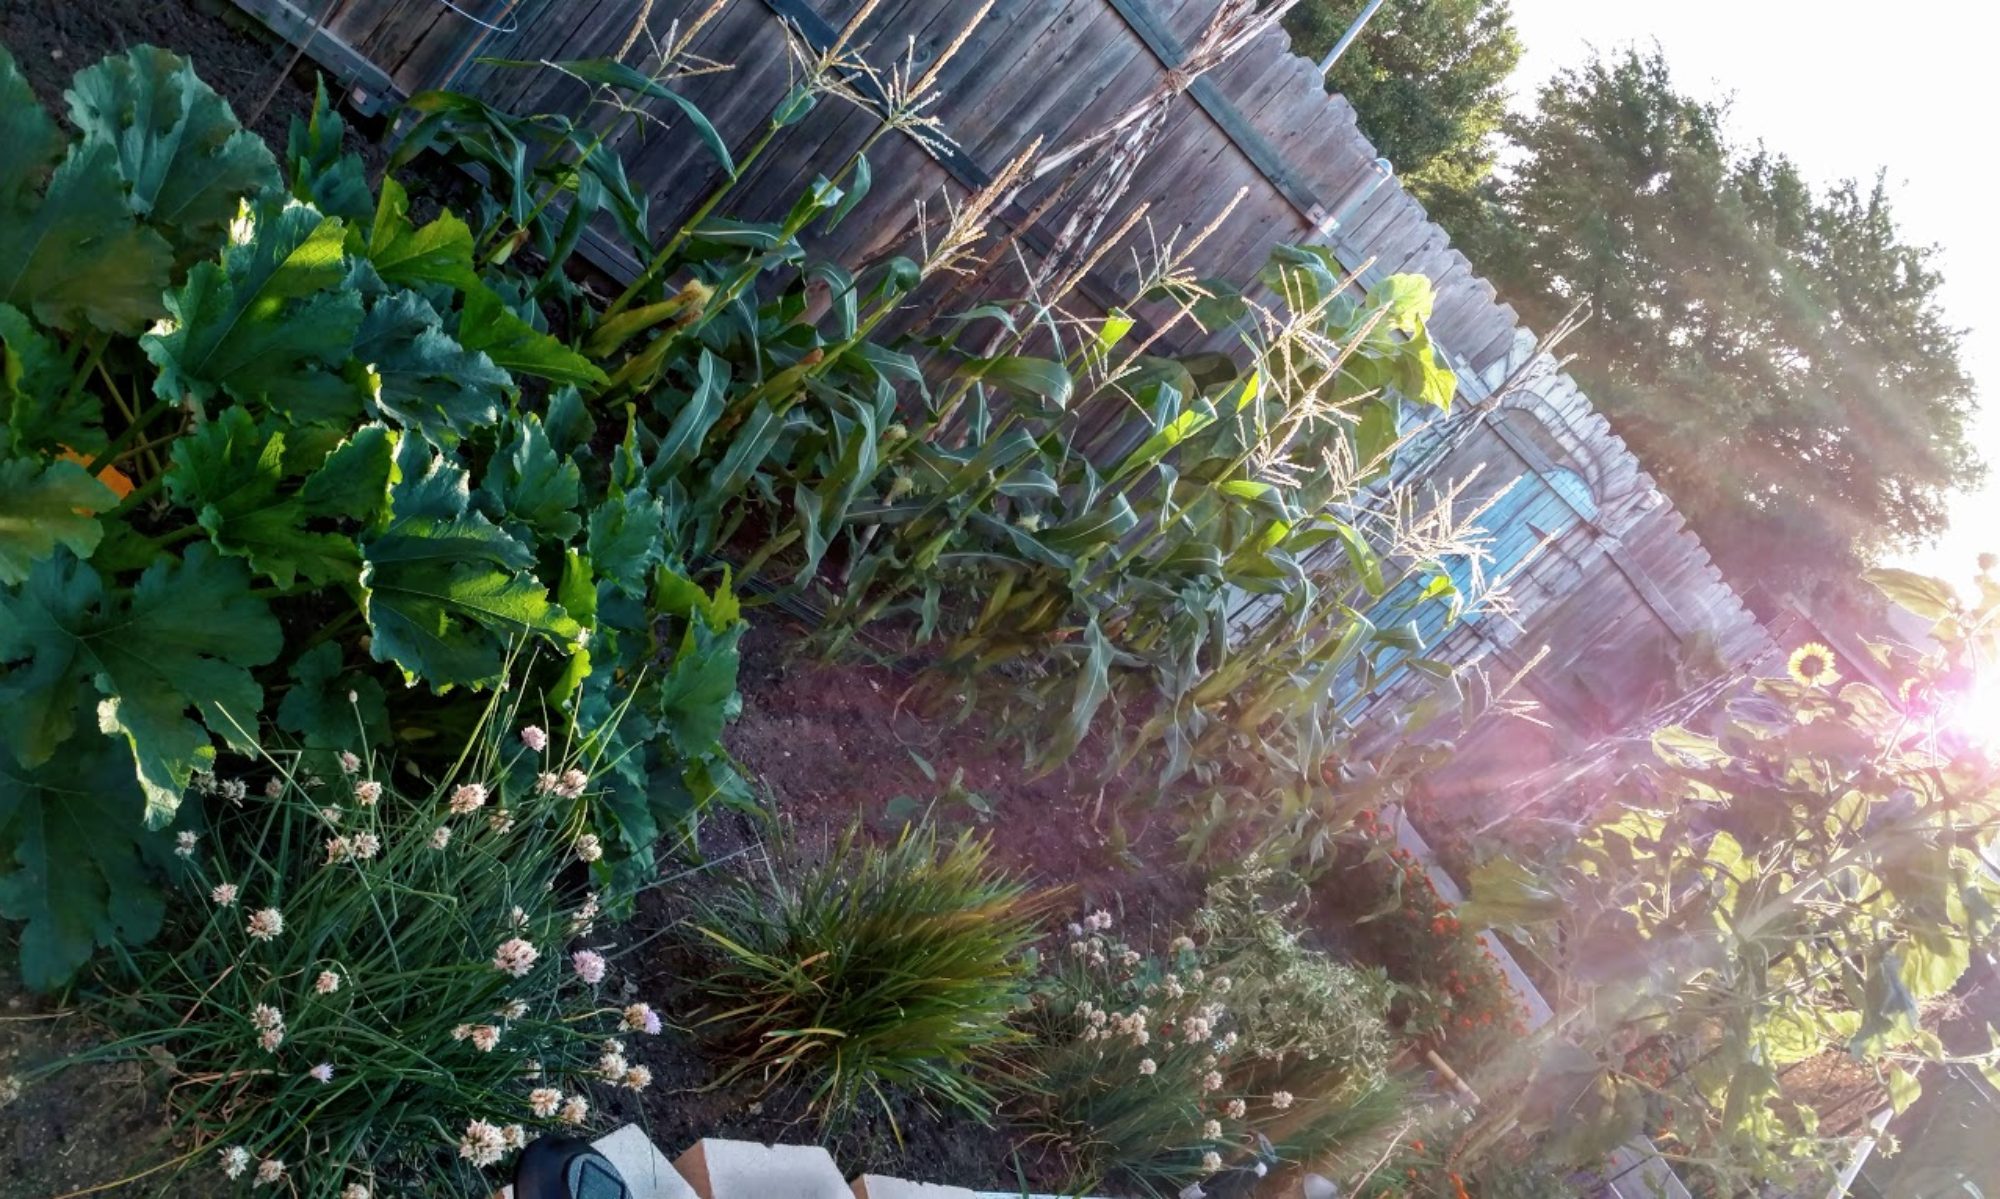
How do you use your corn stalks? I know several of you across the globe from me in places like Australia are gaining momentum and starting to hit your summer months in what is my winter! That means if you have planted corn your close to harvesting those babies and will be left with rows of corn stalks, leaves and husks. Those of you in the states like me in January are planning for your corn beds. As your seasons progress keep in mind some of the benefits of the corn stalks and leaves.
To Compost or Not to Compost
I used to throw all of the entire plant in the composter. However, over the last few seasons I have started composting the husks as soon as I peel my corn and using the stalks and leaves real-time in my gardens as a natural wordless mulch!
Mulching your beds is great for moister retention and helps with water maintainance. However, using only wood mulch at times can make it hard to get into the dirt. Personally, I like to be able to easily move my soil. In addition, if you’re in an area prone to termites and your beds are around your house, using wood mulch that will consistently be wet or moist may not be the best thing for your home.
Using your corn stalks in your beds
There are so many alternatives to using only wood. Your gardens plants can make some amazing mulch especially plants like asparagus and corn. Consider allowing your stalks a bit of time to die down after your corn is harvested. Let them stand until they have lost some of their green. You can still plant below them as they start to die. Leaving them in the soil for a bit actually looks cool! More so however it helps return some of those used nutrients back to the ground.
Once your plants have lost some of their green lift them from the beds and chop them into small pieces. They will decompose faster this way. Lay them around your plants as you would mulch; or, till them into your beds. Both of these methods will help put organic matter back into you soil!1
The health of the soil in ones garden is as important as the foundation of their home! As such, once someone has decided where they want to place a new bed, or even if they are using existing beds over and over again each season, an assessment of the soil should be completed. There are so many things to look at when it comes to soil one might wonder where to start. Two primary options when determining the validity of your soils are:
Having your soil tested.
This process can take up to two weeks. Stick around and I’ll share the ins and out of this as I go through a soil test for my beds in spring.
Performing a self assessment of your soil.
Self assessments are what I have used through the majority of my gardening life. One does learn over time to look for specific signs that will help them determine the health of their soil. However, self assessments can be risky for new gardeners unless they have a good guideline on what to look for. Luckily there is a very structured process one can follow that was created by Oregon State University to determine the health of a garden’s soil.
Oregon State recommends five assessments a year covering 10 steps ranging from soil to water to plant life. We will review each of these steps in a series of articles and how to videos over the next few months. However, let’s kick off the bulk of the assessments by focusing first on soil health and how to asses the texture and structure of your soil
Soil Assessment 1: Texture and Structure
The texture and structure of the soil is how it is put together, how it moves, handles water, and allows plants to grow. As such, soil texture is paramount to ones garden. Soil should have a crumb structure and be friable, (easily crumbled). It should also have good porosity so air, water, roots and organisms can move freely within the soil. This is a balance game though. Why? Because soil that is too friable probably has poor aggregate stability, it won’t hold structure well or retain water well. If on the other hand it does not break apart at all, it’s too hard, cemented or full of clay there will be issues; organisms will not be able to move through the soil.
Many things can impact the quality of your soil. Day-to-day life, weather, erosion, what and when one plant, as well as tilling or not tilling can impact positively or negatively a gardens soils texture.
Completing the Assessment
First off ensure your attempting your assessment when your soil is neither too dry, too wet or frozen. You will need a shovel (or tool to dig into the soil with) and a spray bottle with water.
Choose a few areas of the garden that is considered representative.
Dig a 6 – 10 inch deep area
Scoop up a portion of soil that is about the size and volume of a can of soup.
Review the soil, are their crumbs, clumps of clay, granular soil only?
If there are crumbs present squeeze them and note the amount of pressure it takes to collapse them while dry.
Gently wet some of the crumbs and try to collapse them while wet. Does this require more or less pressure?
Assessing the Findings
Lowest health: Soil has powdery, massive or flaky structure without any visible crumbs.
Moderate Health: There are some crumbs present yet they break under slight pressure. They are also far more fragile when wet.
Best Health: Soil is friable and crumbly! It has a clear crumb structure that maintains its shape under pressure even when wet and can also still be broken between one’s fingers!
Four easy steps to improve least desirable results
1: Allow plants to decompose naturally if possible.
Late summer flowers naturally dying down
Allowing plants to decompose naturally is important to an organic garden. Not only that but if done correctly adds beauty to a garden and another season of life. Decomposition promotes organic growth in the soil. On the other hand leaving soil completely empty for long periods of time can drive erosion or overly compacted soil making it hard to manage or work through.
2: Have clear walkways through your garden!
Stone Path for getting through the center of the garden
This is one of the simplest things to do. Consider what one weighs. Consistently walking through the beds one is planting in can compact the soil to the point that it is no longer friable. Therefore, create beauty and character in your garden while also respecting your soil by laying small stepping-stones through your beds. Create committed walk ways such as my path directly down the middle of my large beds here. Plan for clearly laid out walkways between plants. Giving enough room to walk through for harvest but not touching the base soil the plants are thriving in.
3: Add organic matter to your soil!
Using dried corn leaves for mulch
Organic matter promotes organisms in your garden that break your soil down, It also promotes drainage and worms. Here are some cheap and easy ways to add organic matter to your soil.
Grow companion plants that support your main crops but easily break down in your garden all summer long. Borage, Comfrey, Yarrow, Marigolds
4: Use cover crops in the winter.
Garlic in Winter
In my experience the best cover crops are winter garden plants such as snow peas, cabbage, sweet peas, lettuce, radishes, garlic and other plants that love the cold.
These plants not only keep your soil busy but enable you to continue to eat the freshest foods available over your winter months. Other options are grassy plants, that die down easily preventing the need for heavy tilling such as alfalfa or buckwheat,
Want to see more?
Register with Oma’s Gardens and get notified as these and more steps are completed surrounding soil assessments over the next few weeks:
Compacted Layers of Soil: Garden Soil Assessment 2
Soil Work-ability: Garden Soil Assessment 3
Soil Organisms: Garden Soil Assessment 4
Earthworm Abundance: Garden Soil Assessment 5
Water Infiltration and Availability: Garden Soil Assessment 6
When one mentions tomatillos to me the first thing I think of is green salsa! Spicy green salsa at that or slightly brownish orange salsa! The color that’s created when one mixes tomatillos with their cousin the red tomato. The second thing that comes to mind is the signature lantern or balloon like husks they grown in. This is one characteristic that is so unique to the tomatillo and also makes them such an interesting plant to grow in your garden.
About Tomatillos
Tomatillos are native to Central America. According to Bonnie Plants they can be found growing wild in fields along with corn and beans. This is not surprising actually because if you have ever grown them they tend to act like a wild plant. Meaning they attempt to sprawl everywhere. They also grow very tall reaching heights of five feet or more and at least four or more feet wide. As such if your planning to grow tomatillos plan for space as they take lots of room!
Growing Tomatillos
Tomatillos can be grown with similar conditions as tomatoes. However, Unlike tomatoes who can be very finicky and sometimes hard to grow, the tomatillo, if grown correctly will produce abundantly allowing for many of the amazing Mexican food dishes we all love and plenty of canning. There are a few things to keep in mind when growing these green babies:
You can’t grow just one! And that is a literal statement! One of the more interesting requirements for tomatillos is they must cross pollinate. As a result one must always grow a minimum of two. I personally prefer four to six in my beds.
Plan for their size! Tomatillos are big plants! They have long arms that will fill with husks and get heavier as the fruit matures. They require sturdy cages.
Full sun with shade! Tomatillos can take the heat fairly well for tomatoes; however like their cousins they flower and produce the most fruit in 80-90 degree weather. As such, plant them in an area where they can obtain some shade in the hottest parts of the day during high heat.
Keep them healthy in the hot summer months and you will have fruit both spring and fall.
Tomatillos require heavy pollination and as mentioned before cross pollination. As such plant them with other flowers that will be sure to draw the bees!
Planting
Start seeds indoors about 6 weeks before the last frost unless you are in a zone that allows for warm nights.
I prefer to plant in sets of two with about 6 inches between them and a minimum of three sets. Space sets at least 4 feet apart. This works with one plant as well just space them apart the same as a set.
Tomatillos like well-drained rich soil and full sun.
Harvest your tomatillos when the husks are well filled and the fruit is a bright green.
If the fruit starts to turn a lighter yellow they are at risk of becoming overripe!
Companion Plants
Basil (let some bloom!)
Parsley
Marigolds
Daisy’s
Zinnias
Onions
Garlic
Carrots
Artichokes
Plants that should not be grown with tomatillos due to cross pest action
Your walking around the garden looking at the all the beauty and notice this white powder that looks like its floating across your leaves. What is that? Well if you have had lots of rain, lots of humidity or have plants growing in a tight spot then you are more than likely dealing with powdery mildew.
Powdery Mildew showing up on my Gourds!
About Powdery Mildew
Powdery Mildew is a fungal disease that actually has several different strains. Figures it would want to ensure it is available to a wide variation of plants! It is most active in temperatures that range from around 68 to 90 degrees nights being the cooler of the range. This means one will find it more often in their spring and fall beds which is right where my issues are showing up! It’s also more often to show up during heavy rainy periods with high humidity.
Because there are multiple strains you will not always find it spreading; however, if you have like families of plants together watch out. It can take over quickly if not cared for. For example if you plant your Cucurbita together (Squash, Pumpkin etc) what ever strain hits one will quickly spread to the next.
Powdery Mildew on my pumpkins which are growing right next to cucumbers
What is on your Zinnias (another plant that is susceptible) will not effect your roses It will however effect other plants that are members of the same composite family. Powdery Mildew is air born so be careful when removing effected leaves and never place them in your compost.
Easy Tips for Managing Powdery Mildew
The most common recipe is Baking Soda(1 tbsp); Dish-washing soap (2 tsp) and one gallon of water. Spray this on your plants when the sun is low so as not to burn them. Baking soda can also be strong for some plants so test them one day and check them the next before full application. Adjust the tbsp down accordingly to 1/2 tbsp if needed.
Neem Oil, the pure organic cold pressed oil not what is pre-mixed, is also great. Mix 1 tsp in with your baking soda. You can also substitute Neem Oil at 2 tsp in place of baking powder.
Milk has been reported to help stop the growth of powdery mildew. I have not tried this recipe. I plan to test it out this month with the issues I have going on right now. I will update on that result! Mix is 60/40 with milk at 60%.


 Depending on how deeply the garlic was buried one can often see the dirt start to mound up around the base of the garlic stalk. This naturally occurs as the bulbs starts to expand below the ground. While looking at your leaves and the size of your stalks look at the soil! Is there mounding or cracking around the stalk? If the other two steps are present, and there is no dirt movement, continue with the next step anyway.


 Growing healthy roses can be one of the most enjoyable things to do… it can also be frustrating as they tend to get hit with things like Black Spot or other similar diseases. Here are a few Quick Tips to help your roses thrive:


 As a result, their greenery or their flowers can sometimes look shabby. An easy way to take care of the greenery is simply to trim it back. They clip easily with shears almost like a shrub making the leaves very tidy and nice looking with the tall flowers sitting atop them.


 The texture and structure of the soil is how it is put together, how it moves, handles water, and allows plants to grow. As such, soil texture is paramount to ones garden. Soil should have a crumb structure and be friable, (easily crumbled). It should also have good porosity so air, water, roots and organisms can move freely within the soil. This is a balance game though. Why? Because soil that is too friable probably has poor aggregate stability, it won’t hold structure well or retain water well. If on the other hand it does not break apart at all, it’s too hard, cemented or full of clay there will be issues; organisms will not be able to move through the soil.


 Tomatillos are native to Central America. According to


You must be logged in to post a comment.