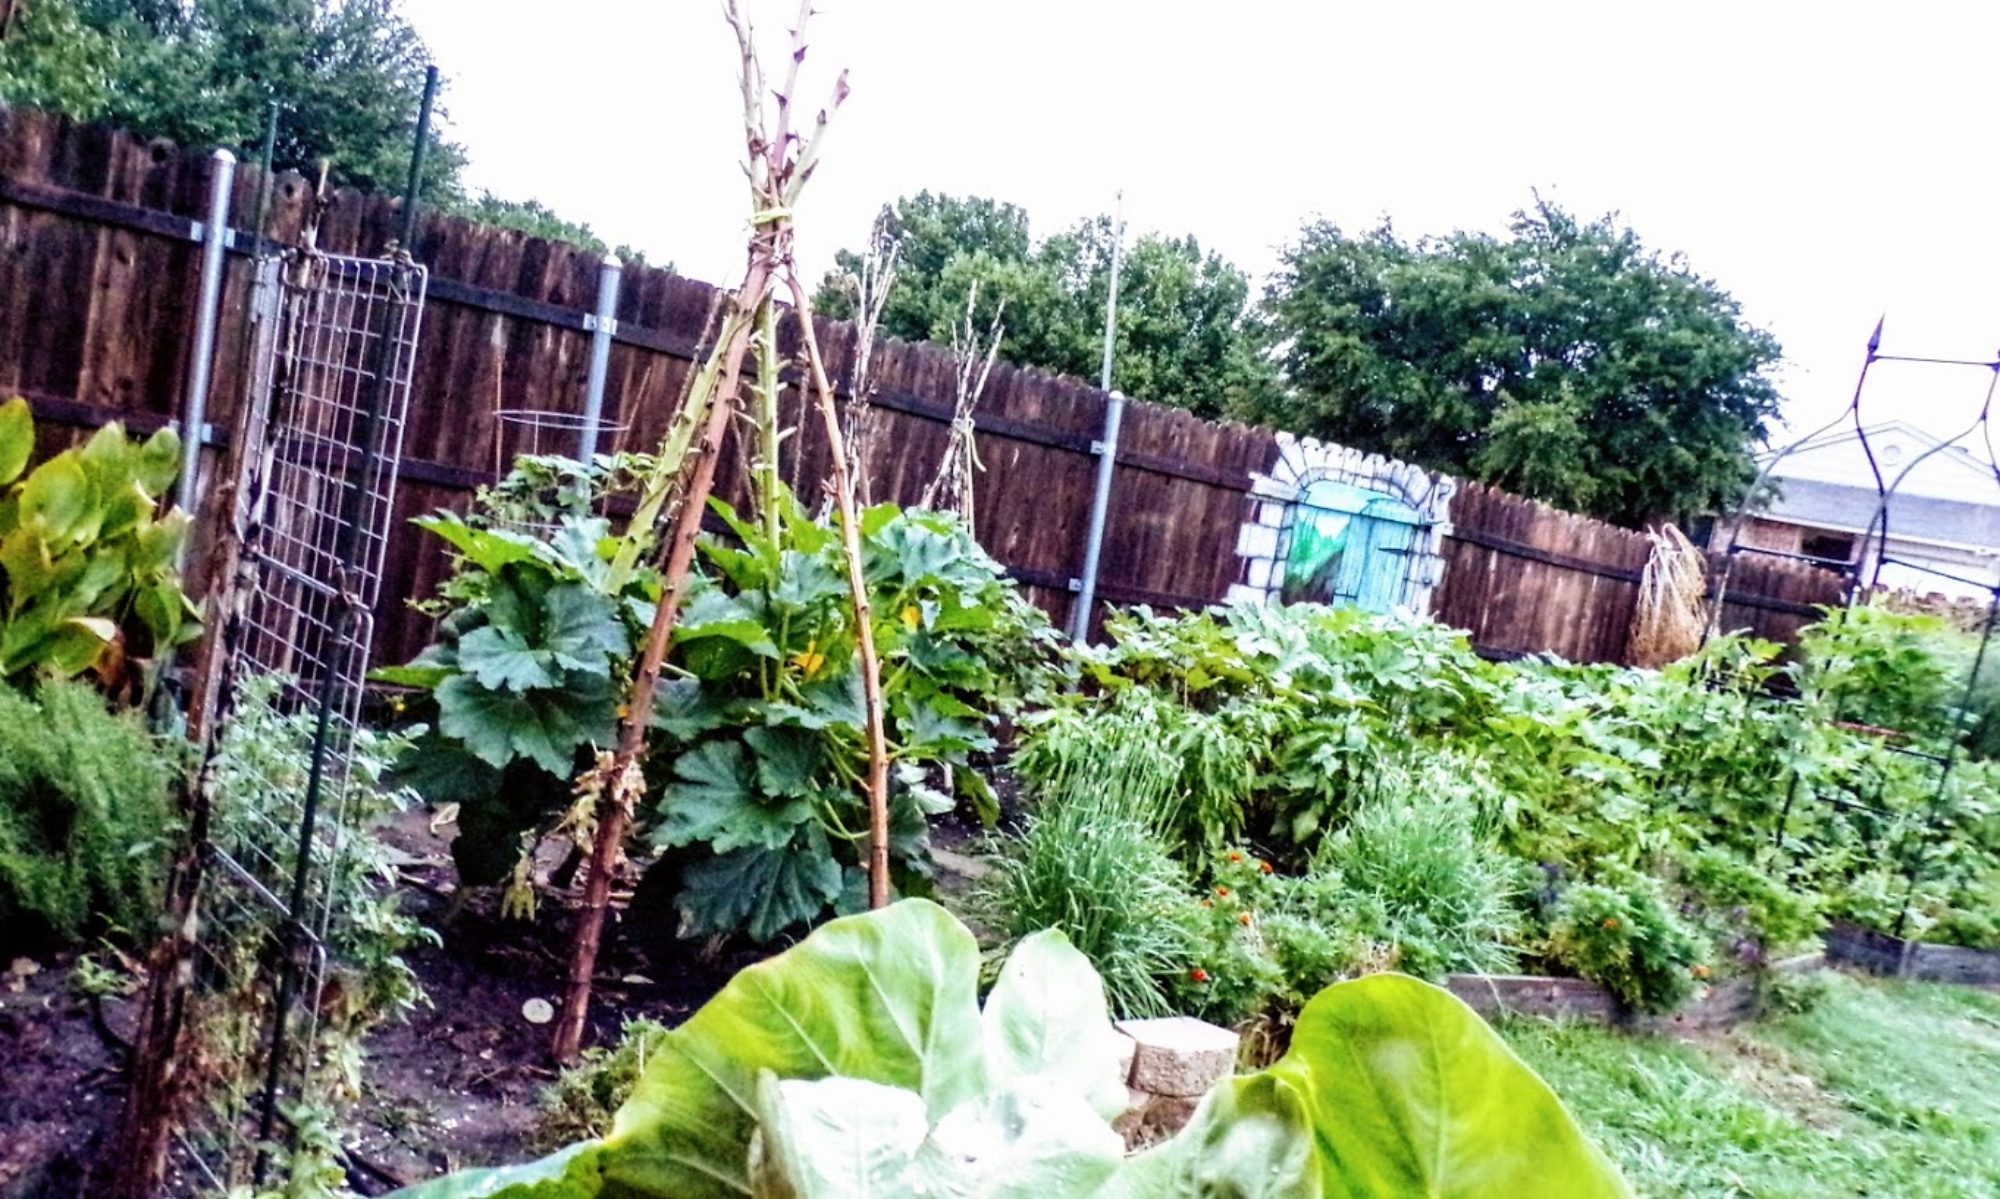
Growing Spinach

Spinach has rolled itself into the favorite winter plants category in my garden.  When picked fresh it is so good!  Spinach is a cold crop, which means it falls into the family of plants that love the cold weather! This makes growing spinach in my zone 7b garden a must!!

One of my favorite spinach's to grow is Gurneys Seed  Goliath Spinach.   I grow this Spinacia oleracea for its amazingly large buttery leaves that can reach up to 8 inches across while maintaining its sweet tender texture.  Spinach can be a bit picky; so, here are some tips for growing this beautiful vegetable in your backyard, kitchen or plot garden. 

    • Sow seeds in cool weather when the ground is workable. 
    • Spinach is super cold-hearted and loves the cold sun! Find a bright spot! Plan for morning shade and afternoon sun in the winter, In spring find a spot with morning sun and afternoon shade as it extends the growing period into hotter weather.

    • Spinach likes well draining rich composted soil.  They use lot's of food creating their thick vitamin rich leaves.
    • Use a consistent water schedule.  Let the ground get semi-dry between watering. They will for sure cry and wilt if you've waited too long.

    • Mulch your babies with fresh leaves or hay in colder weather to allow for a bit of a blanket if needed.
    • Once seedlings reach around 2 inches tall thin or transplant leaving 6 to 12 inches between each plant.
    • Feed monthly with coffee grinds and Epsom salt.  Use a good organic microbes spray.  My favorites are shared below!
    • Harvest from the outside in. Leave the center of the plant to continue producing more leaves.  Or, cut the entire plant at the base leaving the roots to reproduce as long as possible into spring.

Companion planting with Spinach

Beans and Peas add nitrogen to the soil helping with feeding spinach.  They are also taller plants and are wonderful to use as companions in spring gardens. Planting spinach below these taller plants in spring can extend the life of spinach with shade as heat arrives.

    • Cabbage, kale, Brussels anything in the Brassicas family.
    • Lettuces
    • Radishes can act as sacrificial plants near spinach drawing leaf mining insects to them.
    • Marigolds on a boarder offer pest protection as well.
    • Do NOT grow spinach with plants that need dry soil, they will cancel each other out
    • Do NOT grow spinach near potatoes.  Well, perhaps be wary.  Spinach is a shallow root plant so it can easily be grown with spinach and not impact the potatoes.  Potatoes however have a larger pest issue with flea beetles who also love spinach leaves.  Therefore, planting spinach with potatoes could very well create a flea beetle issue with your spinach. And spinach is all about the leaves.

Oma's Favorites

From raised beds to garden boots, hats and everything in between below are some of the wonderful companies I'm happy to support.  Each of these products can be found actively used in my everyday gardens.  If you have any questions about how I use them just reach out.  They have also graciously provided me a code in many cases that provides a discount if you choose to try them.    In some cases I do make a small percentage for purchases you may make.  In turn I'm able to offer these discounts and continue sharing tips for your own home gardens.

Growing Tabasco Peppers

I get simple enjoyment out of growing Tabasco peppers. They remind me of thanksgiving and Christmas all rolled into one.  I know it sounds strange but it's the colors.  They are like little bulbs standing straight and tall in beautiful shades of orange and red.  The happiness they make me feel when I see them in the yard all bright and beautiful against the dying fall garden is just that, pure happiness.  

About Tabasco

Tabasco originates in mexico. They have a heat level that ranges from 30,000 to 50,000 on the heat scale. It's heat compares to the Cayenne pepper and has a hotter burn than the jalapeno pepper.  I love it however, on eggs and in stews and salsa. Tabasco's are tapered and grow about 2 to 3 inches in length and are most famous for the world renowned Tabasco hot sauce.

Growing Tabasco

    • Tabasco takes about 80 to 90 days to grow.  Therefore one should plan to start them indoors if living in a climate with short summer periods. 
    • Start seeds in loose soil set about ½ inch down.  I like using Grow mate Organics Root Max to give them an exceptional start.
    • Tabasco needs warm temperatures from 75 degrees up.
    • Plant in a sunny location with well draining soil and feed them monthly with Epsom salt and Coffee Grinds. I also had great results spraying them monthly with Happy Tree Microbes 
    • Tabasco needs room to branch! Plant to space the plants between 1.5-2 feet apart from each other.
    • Harvest Tabasco when the peppers have turned orange or red.  Be careful though they turn quick! They can hit that red color and within a day or so start to brown out. As such be ready for harvest! Tabasco can be harvested when green or pale yellow and allowed to ripen indoors if needed. Their flavor however is best when harvested at the last minute!
    • Tabasco needs around an inch of water a week, heavier watering during fruiting!  I allow them to dry between watering.  However, if temps reach above 95 degrees and they are fruiting, lean towards a consistent slightly moist soil to help avoid calcium issues. For example,  blossom end rot.

Companion Planting with Tabasco Plants

There is mixed opinion on Tabasco plants in regards to companion planting.  I read years ago from Homeguides SFGates to plant them separate from tomatoes, eggplants and potatoes. to avoid soil borne diseases prevalent in these types of plants.  Other sites promote them together.  Personally I have always kept my peppers separate, grown in another spot away from tomatoes and eggplant and practice planting with the following:

    • Zinnias, Basil, Garlic Chives, Marigolds, Lavender and Rosemary.
    • Planting peppers around these flowers supports both plants.  The flowers bring pollinators that help peppers have the best possible fruiting,  In return peppers help protect the flowers from insects that don't like the smell of hot spicy peppers.  

In The Works

    • Tabasco Hot Sauce Recipe !

Shop Oma's Favorites

I do make a small percentage for each product sold, so that I may in turn offer those discounts to you.  


Follow Me On Instagram

Growing Rosemary

There are so many reasons why growing rosemary is essential in a garden, the simplest being that once established, rosemary is an easy to grow, extremely good smelling and edible shrub!  Rosemary can grow up to several feet in height and can be hedged to fill hard to grow spots, tall background borders and rustic areas in gardens.  It’s the perfect sun lover and is listed by the Farmers Almanac  as a perennial in US zones 7 and up.   Throw in all of the edible and medicinal values of rosemary and it’s easy to understand why growing rosemary is an essential herb.

Harvesting Rosemary. Boots by Western Chief, Gloves by Digzy Gardening Gloves.

Growing Rosemary from Seed

There are a few ways to start rosemary plants; one can use seeds, cuttings or established plants from a nursery or garden center.   Although rosemary is a super strong, hardy and vigorous plant once established, starting from seed is actually the more difficult way to acquire one’s plants. Therefore, we shall start with seeds first. 

    • It’s recommended to start rosemary seeds indoors or in a greenhouse a good 90 to 120 days before planting outside.  
    • Use small seed starter pots made from coconut husk soil or a good organic potting mix. Moisten the pods or soil mixed planters with water.  
    • Ensure the top layer is moist but not drowning.  Shake the tiny rosemary seeds across the top of the soil surface.  
    • Rosemary is open air germinated so take care to not cover he seeds with soil. Simply press them on the soil gently and spray again with water to moisten the seeds.  A quart water spray mister bottle is perfect for this stage of plant growth. 
    • Place moistened seeds in a warm bright window, greenhouse or lighted tent. Spray or mist with water daily ensuring seeds have a moist spot to germinate.  

Once the babies reach about an inch tall, pot them up. Use large enough pots to ensure the roots are not disturbed and will enable the plants to grow a minimum of 90 days before they are migrated outdoors.

Harvesting Rosemary. Boots by Western Chief, Gloves by Digzy Gardening Gloves.

Weather and Soil

When migrating rosemary, consider the following: 

    • Rosemary needs dry hot areas and once established to be left alone! Just come back every now and then for water and a good cut!
    • Rosemary grows best in sandy loam soil. Clay ridden soil will be an issue as it holds water making it conducive to root rot. When faced with clay soil one will need to either modify the soil, move rosemary to another location, or consider them permanently potted.
Harvesting Rosemary. Boots by Western Chief, Gloves by Digzy Gardening gloves.

Companion Plants

Companion planting is the process of joining plants in a way that enhances their natural abilities to thrive.  Some of the best plants to grow with rosemary include:

    • Brassicas: Rosemary is a friend to brassica plants as its smell can confuse their predators .  Therefore, always plant rosemary near cabbage, cauliflower, broccoli, kale, Brussels, and any other plants in this wonderful family.
    • Other plants that benefit when paired Rosemary include:
      • Lavender, Thyme, Sage, Marigolds, Marjoram, Strawberries, Sunflowers, Rudbeckia

Cautionary plant combinations

Plant groupings one should avoid if possible; or, if necessary plan ahead ways to manage the challenges ensuring both plants thrive.  

        • Mint:  Mint needs shady moist spots; rosemary needs sunny dry spots.  Right off the bat they do not get along.
        • Basil: Basil loves the sun!! Yea! So why not basil and rosemary?  Water of course. Basil loves the sun; yet, needs a consistently moist bed.   Rosemary, yep.. must have dry soil!
        • Other plants with the same conflicts include:Cucumbers, zinnias, tomatoes and any plant that loves moist hot conditions.
        • Squash:  Why? Powdery mildew.  Squash and pumpkins or other plants in the squash family have a tendency for powdery mildew.  Rosemary, although resistant to bugs, is prone to powdery mildew. Planting them together promotes situations where one or the other plants are consistently passing it back and forth.

Next in works on this series

    • Growing rosemary from cuttings

Shop Oma’s Favorites

    • Western Chief is my go to place for Garden boots and shoes.  So comfortable from home to garden for work and play! Use oma20 at checkout for 20% off!
    • I absolutely adore Vego Garden from their bags to their raised beds!
    • Visit Digz Gardening for comfortable,  strong and cute gardening gloves!
Visit me on Instagram @omasgardens

Growing Serranos

Sorrano Peppers grown in raised beds by www.Vegogarden.com !

Growing Serrano peppers is a joy. These peppers are similar to a Jalapeno with a much longer thinner body and a bit of a hotter taste. Although, I have personally found the Serrano Chili's flavor to be smoother than the jalapeno, making the heat seem much milder. These shiny green peppers are also red or yellow or orange depending on how long they are left on the plant.

Serranos are simply a wonderful pepper for the garden one plant can provide as many as a 100 peppers in a season. They are also extremely easy to grow or pickle and can be used in any recipe where a jalapeno has traditionally been used.

Tips for Growing Serranos!

  • Plant Serrano's after all fear of frost has passed; or, start indoors using a heat pad to ensure soil is warm for germination. 
  • Once planted outdoors use a well drained loamy soil with good organic matter and some compost.  I use a bag of Black Cow Compost mixed in with the soil.
  • Serrano's do best in full sun.  In zones 7 and above it can get upwards of a hundred degrees and Serrano peppers do well even in the heat; so, plant them in a sunny spot.  

  • Water Serrano's once every three to four days very deeply rather than every day. This promotes strong roots that keeps them healthy even in harsh weather.
  • Serrano's grow well with a little bit of used Coffee grinds once a month along with Epsom salt and Fish Emulsion sprayed on their leaves. I prefer Alaska Fish Emulsion .
Sorrano Peppers grown in raised bed www.Vegogarden.com ! Lovely boots by www.WesternChief.com
  • Plan accordingly for space with Serrano's making sure to allow 18 inches in between each plant for the leaves to spread.
  • Plan to cage Serrano's or provide some type of staking as  branches tend to get heavy when producing peppers.

Companion Plants

Sorrano Peppers grown in raised beds by Vego Garden! Haul garden gear in style with Vego Garden bags!

Marigolds, chives, garlic, onions, sunflowers, beans, tomatoes, corn, zinnias all grow well together with Serrano peppers!


 Shop My Favorites

I absolutely adore my Vego Gardens and will be adding many more as the season moves forward!

Western Chief is my go to Garden boots and shoes.  So comfortable from home to garden for work and play! Use oma20 at checkout for 20% off!

I do make a small percentage for each product sold, so that I may in turn offer those discounts to you.  


Follow Me On Instagram

Amazingly Edible Sunflower


It's no secret I love Sunflowers.  They’re on my fence, in my yard and make up about 60% of my tepees and arbors!  However, let's talk about the amazingly edible sunflower plant!  And not just seeds, all of the plant from the roots to the stalks to the leaves, petals and the seeds are edible.  The majority of the entire sunflower can be eaten.  It's quite amazing actually that most only know of the seeds; and, is the exact reason for this quick series starting with the leaves of the sunflower plants.    

Let's Talk Sunflower Leaves!

Sunflower leaves are simply a joy to me.  Why?  They are so large, so strong and thick they are like pieces of leather on larger sunflower plants. They are beautiful to look at in a garden adding depth and color, texture and even height.   The giant leaves add shade to plants on hot afternoons, helping to extend the lives of cold crops if grown above them. All of this is enough for one to love them.   Imagine the excitement when discovering they’re also edible!  I won't lie, sunflowers have a bite that's hard to explain; it's an extremely unique bitter flavor. Nutty in a way almost peppery as well.  Lets look at ways to eat them!

Young Shoots

Young sunflower shoots are edible microgreens!  Unlike their older siblings that get bitter with age, the microgreens are super soft, have a thick feel and at this point are actually sweet.  Shoots are often grown in window gardens and used on salads and on sandwiches. Let some of the seeds fall each season and the yard will be so full there will be no issues sacrificing many of the babies to the microgreen category!  

Tender Leaves

Tender leaves, those that are still young on soft stalks can be eaten raw in salads. The entire leaf can be eaten at this stage without removing the veins.  Although, they actually taste slightly more bitter to me at this stage believe it or not, I prefer the mid adult leaves.   One can soften the flavor some by removing the center vein of the leaf. 

Large Adult Leaves

Large adult leaves can be cooked like greens, boiled, sauteed or steamed with salt, garlic and butter.  The older they get the tougher they get and the longer they take to cook. When using the super large leaves, boiling first is best with a water refresh.   I like to harvest the leaves in the mid range size prior to blooming.  Once flowers bloom the leaves naturally start to die down.   

I did say they are like the bitter lettuces, with a bite that leaves you wondering how to describe them. Serving with savory dishes compliments the bite of this beautiful green!  They are also wonderful with mushrooms.  The earthy flavor of mushrooms  complements the greens well and they do great with fatty meats.

Here is a recipe for eating with fatty meats

    • 5 to 6 midsize Sunflower leaves
    • 1 quarter purple onion
    • 3 to 4 (or more if your like me 5) garlic cloves 
    • Balsamic vinegar
    • Olive oil
    • Salt
    • Crushed pepper 
    • Butter
    1. Wash, remove the center and main side veins from the leaves. Add olive oil to pan and heat while dicing garlic and red onion. Add Onion and garlic to oil and saute until slightly brown on a low simmer
    2. While cooking garlic and onion boil water and blanch the greens until slightly soft and the water is a soft green.  Drain greens and add to butter, garlic and online mix.
    3. Stir fry  the greens for a moment coating them with the oil. Add a few tablespoons of water.  Add pepper flakes and stir fry in.
    4. Steam well for a moment and then add a generous amount of balsamic vinegar. Lower heat and let simmer for another 10 minutes or so.  If liquid evaporates add more vinegar!
    5. Once the leaves are stir fried and the liquid has evaporated some add butter to the pan and allow it to sizzle

Add salt and pepper and serve hot!


Visit me on Instagram!

Shop my Favorites!

Western Chief – These lovely garden clogs are from Westernchief! Of which I’m a proud garden ambassador!  Their products include garden boots and clogs as well as a range of casual and comfortable house shoes. Visit them online, use OMA20 at checkout for 20% off your own pair!

Note: I earn a small bonus for each purchase.  Thank you in advance for blessing me with that as it’s what enables me to bless you as well with a discount of your own.

Dandelions

Why do so many people hate them? The dandelion I mean not the garden boots and clogs. They're  from Western Chief  and I have to believe all would agree they are pretty awesome. The dandelion however, is so dreaded by so many. One can find many a gentlemen in a fit if these little guys show up in their lawn.

Personally, one of my favorite sayings is, “I have a beautiful yard, yet, it's not a lawn.”  Lawn weed killer of any kind will not be used in these back gardens. That means dandelions and many other unwanted plants full of goodness are finding their way into this space.  The dandelion has become one of the favorites! It's hard to  believe that we as a people work so hard annually to destroy something 100% free, 100% edible and so good for our health.

Why Would one Want Dandelions?

    • Dandelions are perennials, they return every single year with no help from humans at all. Not only that, in many places they are some of the first flowers one will see. That means they bring the bees! These babies are like a light to the little pollinators of the world shining brightly and saying, “here, come here to my yard spring has arrived!” And come they will!
    • The entire Dandelion is edible. From the flowers, (which are super sweet actually no wonder the bees like them) to the stems and the roots. I have grown to love grazing on dandelion flowers. Since I know the yard is poison free they can be eaten just as any other plant grown in this space.
    • The flowers go in almost all salads and the young greens with them. Which by the way are one of the bitters; and, bitters do wonders for our gut. They can be used to make wine or when unopened pickled like capers
    • The roots are large and long (which is why they are so strong) and can be used dried or roasted for anything from coffee to medicine.

Medicinal Uses for Dandelions

The entire plant can actually be used for medicine! Dr. Nicole Apelian has some of the best details in "The Lost Book of Herbal Remedies."  Here are just a few things they can be used for.

    • Roots can be used as a tea to help with Liver, Digestion and gallbladder functions.
    • Fresh Dandelion juice can be used on ones skin to heal wounds and even treat ringworm or warts.
    • Dandelions can help with bladder infections, Iron deficiency and enhance milk production .
    • They include antioxidants that reduce inflammation helping to fight inflammation associated with arthritis.

When to Harvest Dandelions

Dandelions flower in early spring.  This is around April to June in the states and the UK; start harvesting the flowers and flower buds as soon as one sees them! If using the leaves for flowers grab the small ones as they grow more bitter with age.  Save harvesting roots until the plant is around 2 to 3 years old. This way they offer a larger harvest for teas and medicines. The roots here are right at 2 years old. I only harvested a few and decided to wait one more season to gather the big stuff!

Dandelion Tea

Dandelion tea is one of the easiest ways to reap the benefits of dandelions. Here is a quick easy recipe from Dr. Alpine:

    • ½ to 2tsp of dandelion root cut into small pieces
    • 1 cup boiling water
    • Allow roots to steep for 20 minutes
    • Strain and drink up to 3 cups per day for medicinal use.

Dr. Apelian recommends “no sweeteners as they reduce the effectiveness of the root's medicinal properties… add milk to taste if wanted”

Allergies?

Although not frequent people that are allergic to yarrow, marigolds, daisies or other plants in this family may also be allergic to Dandelions.  Pregnant women should also avoid them without doctors consultation.

The more one reads about the dandelion the more they realize it is a misunderstood plant, and could very well be one of the best gifts God has given us in the world of wild plants. So the next time you pass a Dandelion, don't be so quick to judge this little guy, and take a moment to realize how much awesomeness can be found in this single weed.

Visit me on Instagram!

Shop my Favorites!

Western Chief – I’m a proud garden ambassador to Western Chief!  Their products include garden boots and clogs as well as a range of casual shoes, are available in many places and recently can also be found at Costco! Visit them online and use OMA20 at checkout for 20% off your own pair!

Farmers Defense – Farmers Defense offers a wide range of garden products meant to protect gardeners and farmers from the sun and all the itchy things one will discover in the great outdoors.  This hat is literally my favorite hat.  Follow the link for 10% on your own products.   Or, use OMASGARDENS at checkout!

Gurney’s Seeds – If you like the looks of this beautiful lettuce mix and spinach visit Gurneys Seeds, I have used them for a decade at least.  They have some of the best seeds and plants for a gardener to grow!

Note: I earn a small bonus for each purchase.  Thank you in advance for blessing me with that as it’s what enables me to bless you as well with a discount of your own.


Relocating Plants

It's Spring!!  And, it seems all I want to do is move things around in order to get ready for it!   Its almost like that spring fever some get.  You know where one wants to clean their house and rearrange their furniture.  The room feels so new, so clean.   The garden does the same thing to me.  The only difference being when relocating plants, instead of simply shoving the furniture around and being slightly horrified at the mess found below it, roots have to come up.  That's right the entire plant has to be moved and this for some can be a little scary; it doesn't have to be.

Why would one relocate plants?

I have to admit I relocate plants all the times.  Some of my babies have been moved as many as three times.  Why? The biggest reason is expanding the garden.  Take these lavender plants for example.  They were in the perfect place... last year; sitting right at the boarder of my garden.  However, after once again expanding the space they are no longer perfectly placed and have to be moved.   Other reasons could include realizing the perfect place is not perfect.  The plants are not happy.  They are either experiencing too much, or not enough sun or even water etc.  Regardless of the reason, if your on a journey to relocate your plant babies use these tips to help with the transition.

Choose the right day! 

Choosing the day is the number one thing to consider when relocating plants.  Bottom line never move plants unless you absolutely have to on an extremely hot bright sunny day.  That's right, extreme heat can add horrible stress to the plant as it tries to recover so don't move them in the heat.  The best time to move plants is either on a cool sunny in spring or my favorite an overcast cloudy day with a soft rainy occurring.  Doing this makes all the difference to ones plants.

Maintain as much of the root ball and as possible.

Some roots will be lost however savings as much as one can will ensure a fast transition to the new space.

Add Epsom salt to the new spot. 

We are not the only ones who feel relaxed in an Epsom bath.  Nope its the perfect thing to add to plants.  Just a few teaspoons mixed into the soil is perfect to help them relax through the move.  Visit my article Epsom Salt Once a Month! – Quick hit!  for more details on Epsom in your garden.

Keep soil the same level as previously found.

Make note how the plant is sitting in its current space.  Dig the new hole large enough to set the plant fully in the ground and fill the soil back to the same plant height.

Water, water, water

Water should be a given; however here are a few things to help the plants establish faster.

  • Fill the entire new hole with water prior to placing the root ball into it, then fill the soil in over the water.  Yes the soil will soak it up. This helps ensure soft moist soil the now weakened roots can push through as they re-establish themselves.  Second, even if its a plant that prefers little water, provide them a bit extra over the next few weeks.  Don't drown them, ensure however the soil stays semi-moist. Again, this allows those wounded roots to easily take ownership and start to regrow.

In a strange way relocating plants successfully does give one that same feeling of walking into a new room.  Especially when completed successfully, so use these tips and move those babies as needed around that wonderful new space.

Visit me on Instagram!

Shop my Favorites!

Western Chief – I’m a proud garden ambassador to Western Chief!  Their products include garden boots and clogs as well as a range of casual shoes, are available in many places and recently can also be found at Costco! Visit them online and use OMA20 at checkout for 20% off your own pair!

Farmers Defense – Farmers Defense offers a wide range of garden products meant to protect gardeners and farmers from the sun and all the itchy things one will discover in the great outdoors.  This hat is literally my favorite hat.  Follow the link for 10% on your own products.   Or, use OMASGARDENS at checkout!

Note: I earn a small bonus for each purchase.  Thank you in advance for blessing me with that as it’s what enables me to bless you as well with a discount of your own.


Growing Rudbeckia

Did you know the name Rudbeckia means encouragement and motivation?  And if there is anything people may be needing right now it’s encouragement and motivation.  Growing Rudbeckia is a joy; and, I always felt their name fits perfectly.  The meaning of course just explains why one tends to feel so happy when they see them in a yard.  With all of their brilliant yellow they are almost like mini suns, shining in corners and filling up sunny spots. 

About Rudbeckia

There are around  25 different varieties of Rudbeckia; however, their most common name is black-eyed Susan or Becky’s.  Black eyed Susan’s also come in different categories with  petals that range from solid yellow, to slightly burnt orange, to extremely black or dark brown centers that spread out towards bright yellow tips.  I love having all of them all around my yard.

Rudbeckia is similar to Echinacea  in that their roots can be used in some home medicinal remedies.  I hope to look further into this as spring comes closer! If there are plans to use ones Becky’s in medicinal remedies then consider growing several spots around the garden space.  As well as planting them at different intervals.  This ensures as the roots of one plant is being harvested several others are growing in their stead.

Growing Rudbeckia

Rudbeckia can be grown by seed or by division of established plants. Division is simpler as Rudbeckia seeds again, similar to Echinacea, need winters cold to germinate.  If planting by seed sow in the fall when winter is just coming on. Doing this will ensure  enough of a cold spell to germinate well when spring arrives.

Give Becky’s plenty of sun, and well drained soil. Deadhead them to promote more flowers or to stop them from spreading. Otherwise allow the seeds to fall and they will return each season naturally.

image provided by Pinterest

Companion Planting with Rudbeckia

There are so many plants that will grow well with Rudbeckia.  Their flowers for sure bring the bees.  Therefore, just having them in the garden supports any vegetables one grows.  Some of my favorite plants to grow with Rudbeckia are:

  • Zinnias
  • Globe thistle
  • Sedum
  • Perennial hibiscus
  • Echinacea
  • Ornamental grasses
  • Dill
  • Basil
  • Oregano
  • Sunflowers
  • Strawberries
  • Squash

Visit me on Instagram for more tips and tricks on your garden journey!

Follow Me On Instagram @omasgardens