Using Sunflower Stalks in Your Garden!

If you’re a Gardner like me you’re always looking for ways to re-use!   One spends so much time and money on their gardens anyway.  Why not find ways to utilize the plants they grow, (outside of the obvious food of course)!  This was my thought when I started investigating using Sunflower or Okra stalks in my vegetable beds.   I mean Sunflowers are just a beautiful addition to any garden and I plant them everywhere!
Skyscrapers along the back
Mammoth Sunflowers by the Arbor
Skyscrapers Around the Pond
Corn and sunflowers

What really grabbed my attention was the size of them.   Some of these plants grow so tall and the stalks are so large that it just seemed right to use them in the gardens if possible.  As a result, over the last season, I have been testing out both sunflower and okra stalks as tepees and as slat holders in my space.  Here are some tips I have learned on reusing these giant plants.

Tips on using Sunflower and Okra Stalks

  • The stalks of the skyscraper sunflowers can range from three to four inches around at the largest point.  Some even get as high as fifteen feet.  These can make beautiful natural poles for beans etc. As such, if they are in the right spot you may consider not cutting them at all.
    Skyscraper Sunflower sawed for drying

    Plant your veining plants at the base of them and allow them to simply crawl their way up.

However, If you need to utilize your stalks in a spot other than where they grew,  pull them up and clean them for drying.


  • Utilize a small saw to cut them at the base of the plant.  After removing several of them I found it easier, (at least on the larger plants ) to cut them first and deal with the roots later.

    Saw the stalks at the base of the plant
  • Prepare stalks for drying by removing any leaves, stems, flowers etc remaining on the plants.  Do  NOT cut the leaves or stems all the way to the stalk!  Allow about an inch of length to remain.
    Leave about an inch of the stem on your stalks while cleaning

    This sounds odd; however, once dry this tip hardens, and provides great handles for string, twine or rope.

  • Drying is very important.  Okra stalks were harder to dry.  I lost several to mold while attempting to dry them over the fall and winter season.  The weather was too cold and wet.   Sunflower stalks dried much faster and easier with less loss.   As such if your planning on using Okra it’s best to grow them in the spring and use the summer sun to dry them with.
  • Find a place that has full sun and keep them off the ground.   An arbor can provide the perfect spot!
    Sunflower stalks drying on the arbor

  • Sunflower stalks took about 45 days to fully dry.  At that point they were ready for the garden.
  • For tepees utilize heavy garden twine to tie the stalks together; or, twists that are stable enough to hold them together.  It’s also helpful to dig out the area the  tepees will fill prior to tying them up.

    Once more gourd pic because it’s just cool!

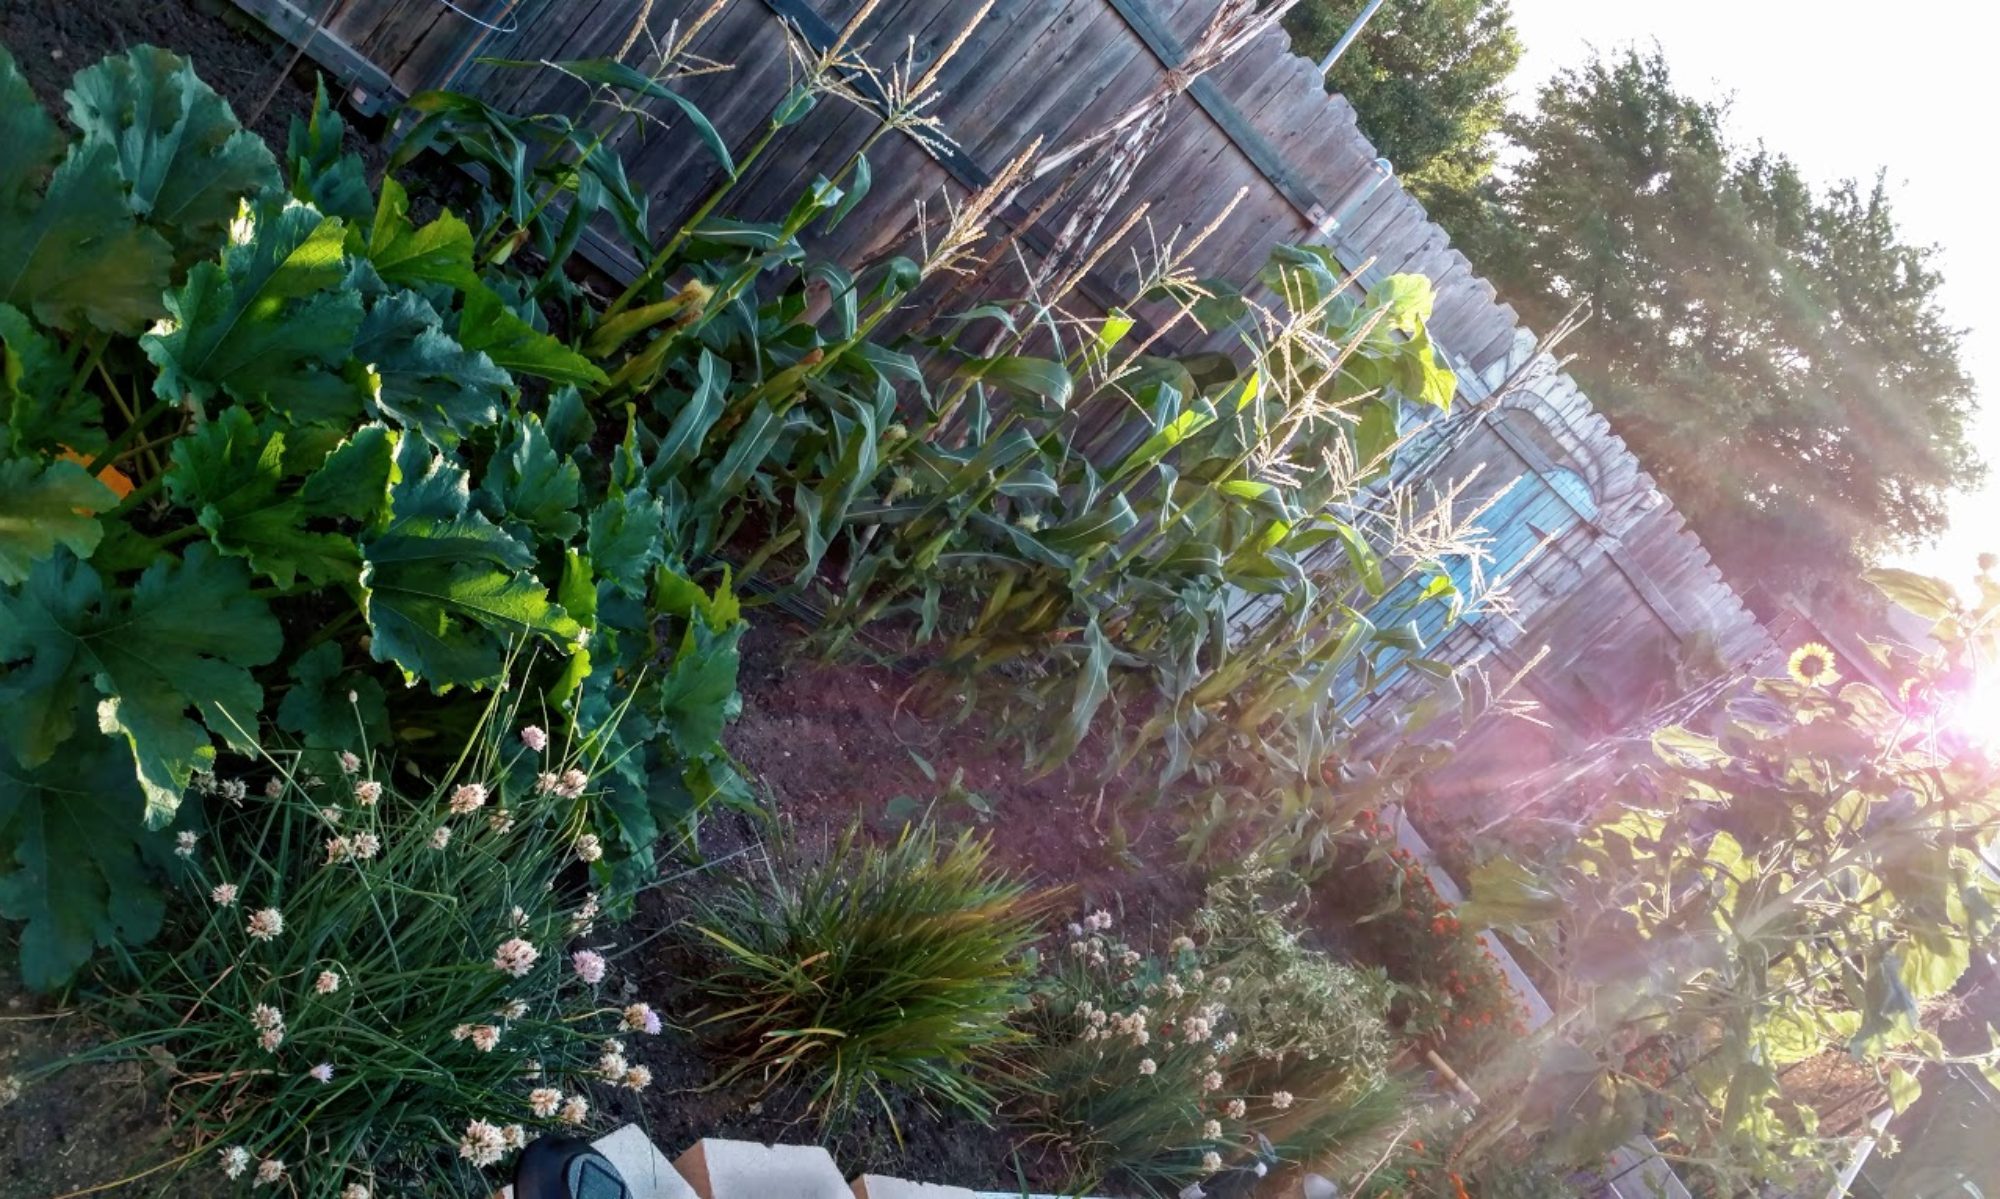
You can find Sunflower and Okra stalks all over my beds.  The larger stalks were used for zucchini and Gourds

Zucchini took up lots of space before the stalks.
Stalks in place, Zucchini now off the ground!
Underestimated the weight of the gourds! Vines were hanging low.
Larger Stalks held the weight lifting them above the plants below them
Once more gourd pic because it’s just cool!
Smaller stalks make perfect bean or cantaloupe tepees.

Overall I have been very satisfied with the beauty and versatility these wonderful plants add to a garden.  Once your flowers are gone, before you throw them out, look around your area and make sure there is not a place their stalks are needed!   Here is a quick video to cover a bit of the content on this article!

Accompanying Content


Visit Oma’s Store Front For Handmade Organic Products

Growing Zinnias!

About Zinnias

Enjoying My Zinnias

I find it hard sometimes to actually say how enjoyable Zinnias are.  They are one of the only flowers that is simultaneously wild and controlled!  One can clearly envision them sprawling across the dry grasslands of South America, growing in an urban garden or, in a planter on ones patio!  Regardless of where their placed growing zinnias, at least for me, is a must in my space! Zinnias come in a rainbow of colors promising summer long beauty and are almost maintenance free. And, as far as pollinators go I'll steal from Kevin Costner’s “Field of Dreams,” and say if you plant them they will come!

How to Grow Zinnias

Zinnias are one of the easiest annual plants to grow.  They do well in full sun 6 or more hours and even hot southern states can trust them to survive.  There are several different kinds of Zinnias, tall from 4-5 feet or, dwarf for boarders and containers.

Tall Zinnias at about four feet.

With so many options every spot in your garden can have color.  Zinnias ideal soil is fertile and well drained; however, they need very little prep.   I honestly do not do much for the soil outside of compost.  I simply choose a spot with good sun, loosen it up and drop the seeds. They don't let me down!  In about 30 days I'll have that beautiful color.  Therefore, plant your Zinnias and then sit back, relax and watch them grow.

Tips for Growing Zinnias

  • Plant Zinnia seeds when temperatures are above 50 degrees with no risk of frost.  Many sites recommend spacing of twelve inches, however I simply sprinkle their seeds randomly in a spot and thin them as they begin to grow.
  • Zinnias are not a good transplant flower. As such, plant them where you wish them to live.  If they must be started early ensure a nice size seeding pot and move them before they’re root bound.
  • Cut spent flower heads often. Cleaning the flowers ensures new flowers all summer long. Drop the seeds if they are in a place you wish them to return year after year or store them for replanting.
  • Zinnias are exceptional cut flowers lasting weeks on your table.
  • This flower can take the heat! However, they do like moist well drained soil. If you have extremely high temp days plan to water them daily during that time or locate in a part shade spot.
  • Zinnias sometimes shed their leaves from the bottom up.  This is caused from high temperature stress or by watering the leaves on the bottom of the plants.  If this occurs simply remove the lower leaves that have browned.
  • Water Zinnias from the bottom only!  They can be prone to powdery mildew and getting their leaves wet expounds this issue. Use soaker hoses or drip hoses or just make sure your holding your sprinkler handle at the ground level.
  • If you have selected tall zinnias don’t underestimate their size. Plan your space knowing how wide and tall they will be (up to five feet tall and two or more feet across).

Zinnias grow fast allowing  fearless experimentation for first time gardeners.  Therefore, don’t be afraid to place them throughout your beds.  

Zinnias as a Companion Plant

  • Zinnias are companion plants for ANY vegetable garden. They are guaranteed to bring the pollinators.  Bees and butterflies constantly fly around them so, if you need pollination they’re a must.
  • Zinnias attract wasps which are beneficial natural enemies to many non beneficial bugs.
  • They attract hummingbirds which eat white flies an enemy of tomatoes, cucumbers and potatoes. And let's just all take a moment to agree hummingbirds are cool.

Zinnias ability to draw pollinators is so good for your space, and the flowers are so beautiful that a small video is really the best way to show you this awesome flower.

Do you grow Zinnias in your garden?  What tips do you have to share?

Grab your favorite photo and visit Oma’s Custom Art Corner!

One Red Pepper in the Making